Meetup 2-Straight Leg Pants with Pockets and elastic waist-2nd Sewing Meetup-Using GStreetFabrics
Step by Step Pants with Pocket 2nd Sewing Meetup Review

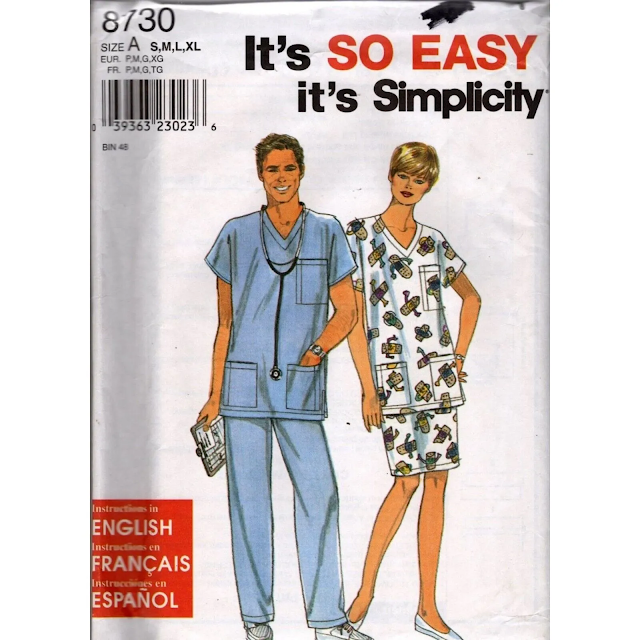
This pattern style, any pattern with elastic waist and pockets works like this.
1. Open Pattern and review your measurements vs the pattern sizing measurements.

Tools you should have around to use when needed.


Cut around pattern pieces and be ready to place on fabric to pin
All in the same direction/grain line on pattern parallel to selvage.Before you put your pattern pieces on your fabric, you can double check your measurements against the pattern pieces.
Measure down 9 inches from your waist. Is that your widest measure?.... Then measure the pattern piece on the front 9inches down. Multiply times 4 and is that the same as your measurement?
Measure the finished length you want the pants. Measure the pattern piece and add about 2 inches for the hem and 1 and 3/8 for the top waistband turn under. I use a double 1" and do a machine hem with a blind hem stitch on the machine. So your pattern piece should be your finished pants length plus 3 3/8 inch.
 Cut 2 of the front pants piece....
 Cut 2 of the back pants piece
 Cut four of the pocket piece.


 pin the open pieces together at the inside crotch line and sew
 pin your pocket pieces onto the outside edges of the pants legs


I have some fingernail polish to match.... you can see how much I cut off the bottom before I hemmed. The pins on the side are where I had to take the pants legs in to make them more of the style I wanted, straight and narrow.


Sew the back to the front inside leg seam for both sides R & L


After sewing the pocket pieces onto th outside edges of both sides of the front and back side pieces, pin the open pieces together and sew from the top of the pants dow to the first clip and then turn and sew around the pocket pieces together so the front and back are sewn together, but leaving the opening of the pockets between the clips, sew from the clip down after going around the pocket piece and you will have a pair of pants.
You can put your elastic circle over the top and fold over and sew in your waistband, just as we did for the leggings type pattern.
Try your pants on and see how they look. Here is where you can take the pants in as needed, shape the legs the way you want and also I put a little pleat just below the elastic to add some interest to the top like pleated fitted pants, since they are so loose.
After sewing the pleats in both sides of the top waist band, I put the pants on inside out and pin, the legs to the straight and narrow, the way I want them to fit me. They are just to baggy for me because I am big at the waist and I needed to taper them down.


I have some fingernail polish to match.... you can see how much I cut off the bottom before I hemmed. The pins on the side are where I had to take the pants legs in to make them more of the style I wanted, straight and narrow.

The fabric came from the 2.97 Treasure Hunt Room
I have enough left to make a crop top.
I will have earrings to match the jacket and scarves of three colors.
Plus my usual Face mask
Oh and a scrunchie
They still need pressing, but I am happy with them now. The next meetup blog will be about the freeflowing jackets. It will match my pants, but there was a lot of improvising, because I got the fabric out of the discount silk bin and it was aburnout and not enough for the sleeves. I got some silk of the same color not burnout for the sleeves, and now I don't like it. I am going to try to improvise on the sleeves with a chiffon sleeve over shrug-not sure what I am doing, but I want to wear the outfit and I like everything to kind of match. So you can read about it on the meetup-Freeflowing jacket.

Comments
Post a Comment